1、客户端环境准备
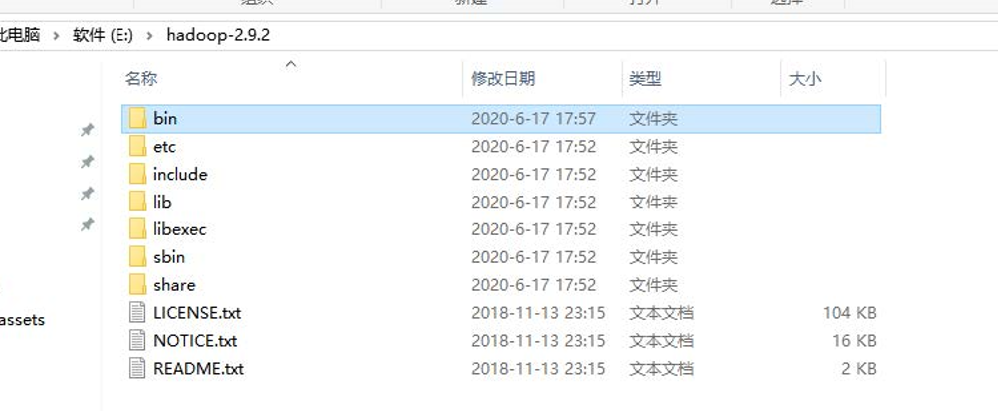
(1)将Hadoop-2.9.2安装包解压到非中文路径(例如:E:\hadoop-2.9.2)
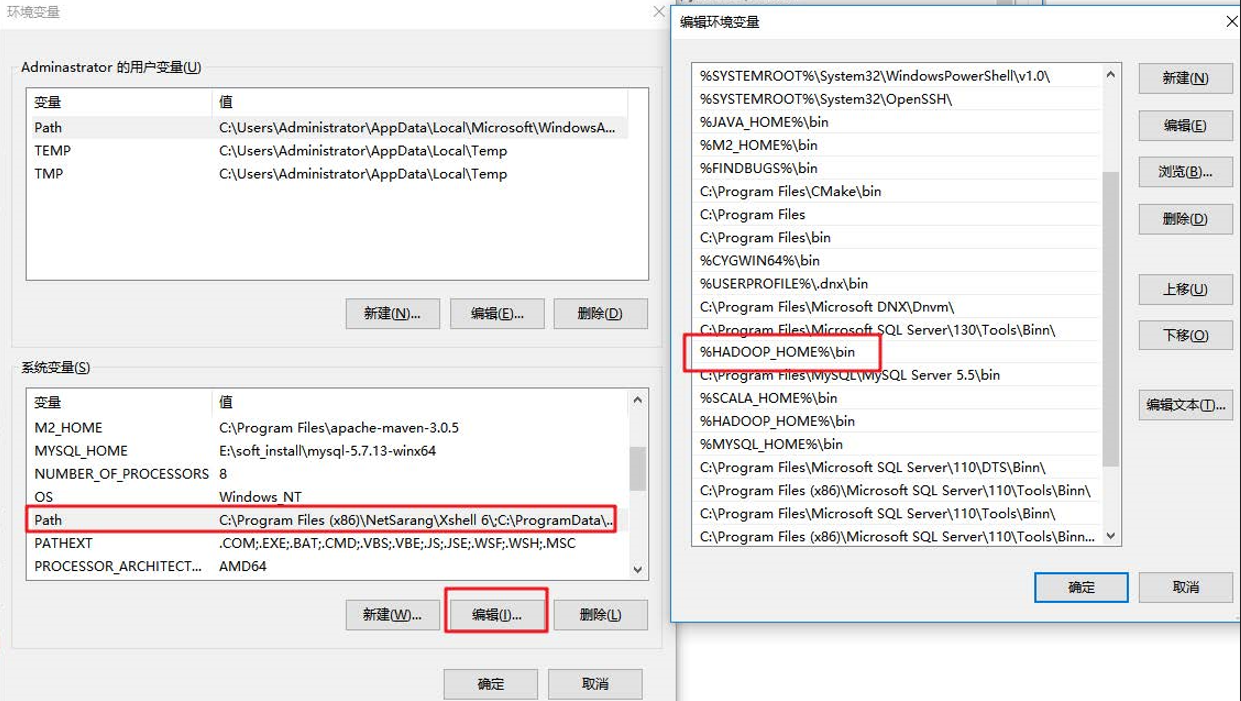
(2) 配置HADOOP_HOME环境变量

(3) 配置Path环境变量。
(4) 创建一个Maven工程ClientDemo
(5)导入相应的依赖坐标+日志配置文件
<?xml version="1.0" encoding="UTF-8"?>
<project xmlns="http://maven.apache.org/POM/4.0.0"xmlns:xsi="http://www.w3.org/2001/XMLSchema-instance"xsi:schemaLocation="http://maven.apache.org/POM/4.0.0 http://maven.apache.org/xsd/maven-4.0.0.xsd"><modelVersion>4.0.0</modelVersion><groupId>com.lagou.hdfs</groupId><artifactId>client_demo</artifactId><version>1.0-SNAPSHOT</version><dependencies><dependency><groupId>junit</groupId><artifactId>junit</artifactId><version>RELEASE</version></dependency><dependency><groupId>org.apache.logging.log4j</groupId><artifactId>log4j-core</artifactId><version>2.8.2</version></dependency><dependency><groupId>org.apache.hadoop</groupId><artifactId>hadoop-common</artifactId><version>2.9.2</version></dependency><!-- https://mvnrepository.com/artifact/org.apache.hadoop/hadoop-client --><dependency><groupId>org.apache.hadoop</groupId><artifactId>hadoop-client</artifactId><version>2.9.2</version></dependency><!-- https://mvnrepository.com/artifact/org.apache.hadoop/hadoop-hdfs --><dependency><groupId>org.apache.hadoop</groupId><artifactId>hadoop-hdfs</artifactId><version>2.9.2</version></dependency></dependencies><build><plugins><plugin><groupId>org.apache.maven.plugins</groupId><artifactId>maven-compiler-plugin</artifactId><version>3.5.1</version><configuration><source>1.8</source><target>1.8</target></configuration></plugin></plugins></build></project>
为了便于控制程序运行打印的日志数量,需要在项目的src/main/resources目录下,新建一个文件,命名为“log4j.properties”,文件内容:
log4j.rootLogger=INFO, stdout
log4j.appender.stdout=org.apache.log4j.ConsoleAppender
log4j.appender.stdout.layout=org.apache.log4j.PatternLayout
log4j.appender.stdout.layout.ConversionPattern=%d %p [%c] - %m%n
log4j.appender.logfile=org.apache.log4j.FileAppender
log4j.appender.logfile.File=target/spring.log
log4j.appender.logfile.layout=org.apache.log4j.PatternLayout
log4j.appender.logfile.layout.ConversionPattern=%d %p [%c] - %m%n
(6)创建包名:com.lagou.hdfs
(7)创建HdfsClient类
public class HdfsClientDemo {@Testpublic void testMkdirs() throws Exception {// 1、获取Hadoop 集群的configuration对象Configuration configuration = new Configuration();configuration.set("fs.defaultFS", "hdfs://hadoop1:9000"); // 设置这个属性以后,获取FileSystem对象时,就不在需要创建URI连接对象了。使用这种方式,不能指定对象,可能会引发权限不足问题,解决办法参考下面文章// 2、根据configuration获取FileSystem对象// FileSystem fileSystem = FileSystem.get(new URI("hdfs://hadoop1:9000"), configuration, "root");FileSystem fileSystem = FileSystem.get(configuration);// 3、使用FileSystem对象创建一个测试目录fileSystem.mkdirs(new Path("/api_test11"));// 4、释放FileSystem对象(类似数据库连接)fileSystem.close();}
}
注意:
(1)windows解压安装Hadoop后,在调用相关API操作HDFS集群时可能会报错,这是由于Hadoop安装缺少windows操作系统相关文件所致,如下图:

解决方案:
从资料文件夹中找到winutils.exe拷贝放到windows系统Hadoop安装目录的bin目录下即可!!
链接:文件地址
(2)HDFS文件系统权限问题
如果不指定操作HDFS集群的用户信息,默认是获取当前操作系统的用户信息,出现权限被拒绝的问题,报错如下:

- hdfs的文件权限机制与linux系统的文件权限机制类似!!
- r:read w:write x:execute 权限x对于文件表示忽略,对于文件夹表示是否有权限访问其内容
- 如果linux系统用户zhangsan使用hadoop命令创建一个文件,那么这个文件在HDFS当中的owner就是zhangsan
- HDFS文件权限的目的,防止好人做错事,而不是阻止坏人做坏事。HDFS相信你告诉我你是谁,你就是谁!!
解决方案:
- 指定用户信息获取FileSystem对象
- 关闭HDFS集群权限校验
vim hdfs-site.xml
#添加如下属性
<property><name>dfs.permissions</name><value>true</value>
</property>
修改完成之后要分发到其它节点,同时要重启HDFS集群
- 基于HDFS权限本身比较鸡肋的特点,我们可以彻底放弃HDFS的权限校验,如果生产环境中我们可以考虑借助kerberos以及sentry等安全框架来管理大数据集群安全。所以我们直接修改HDFS的根目录权限为777
hadoop fs -chmod -R 777 /
2、HDFS的API操作
注:为了后续的使用方便,我对代码进行了改造,将创建Configuration以及FileSystem对象的代码移到了了@Before注解上,关闭流的操作移到了@After注解上,使我们后续的操作重点关注于HDFS api 的使用上。
import org.apache.hadoop.conf.Configuration;
import org.apache.hadoop.fs.*;
import org.apache.hadoop.fs.permission.FsPermission;
import org.apache.hadoop.io.IOUtils;
import org.junit.After;
import org.junit.Before;
import org.junit.Test;import java.io.File;
import java.io.FileInputStream;
import java.io.FileOutputStream;
import java.io.IOException;
import java.net.URI;
import java.net.URISyntaxException;public class HdfsClientDemo {FileSystem fileSystem = null;@Beforepublic void init() throws Exception {Configuration configuration = new Configuration();configuration.set("fs.defaultFS", "hdfs://hadoop1:9000");// configuration.set("dfs.replication","2");fileSystem = FileSystem.get(configuration);}// 现在就只写我们使用FileSystem操作api了@Afterpublic void destroy() throws Exception {fileSystem.close();}}
(1)上传文件
// 上传文件@Testpublic void copyFromLocalToHdfs() throws Exception {/*** src:源文件目录,本地路径* dst:目标文件目录,hdfs路径*/fileSystem.copyFromLocalFile(new Path("C:/Users/小不点/Desktop/VPN.txt"), new Path("/VPN.txt"));// 上传文件到hdfs默认的是3个副本/**如何改变上传文件的副本数量* 1、configuration对象中指定新的副本数量,就是@Before注解下面代码块,注释掉的那一行代码* 2、创建xml文件,在里面添加属性*/}将hdfs-site.xml拷贝到项目的根目录下
<?xml version="1.0" encoding="UTF-8"?>
<?xml-stylesheet type="text/xsl" href="configuration.xsl"?>
<configuration><property><name>dfs.replication</name><value>1</value></property>
</configuration>参数优先级排序:(1)代码中设置的值 >(2)用户自定义配置文件 >(3)服务器的默认配置
(2)下载文件
// 下载文件@Testpublic void copyFromHdfsToLocal() throws Exception {/*** 三个参数* boolean:是否删除源文件* src:源文件目录,hdfs路径* dst:目标文件目录,本地路径*/fileSystem.copyToLocalFile(true, new Path("/VPN.txt"), new Path("D:/下载/VPN.txt"));// 四个参数// boolean delSrc 指是否将原文件删除// Path src 指要下载的文件路径// Path dst 指将文件下载到的路径// boolean useRawLocalFileSystem 是否开启文件校验}(3)删除文件/文件夹
// 删除文件或文件夹@Testpublic void deleteFile() throws IOException {// boolean值代表是否递归删除文件fileSystem.delete(new Path("/api_test11"), true);}(4)查看文件名称、权限、长度、块信息
// 遍历hdfs的根目录得到文件夹以及文件夹的信息:名称、权限、大小@Testpublic void listFiles() throws Exception {// 得到一个迭代器:装有指定目录下所有的文件信息RemoteIterator<LocatedFileStatus> remoteIterator = fileSystem.listFiles(new Path("/"), true);// 遍历迭代器while (remoteIterator.hasNext()) {LocatedFileStatus fileStatus = remoteIterator.next();// 文件名称String fileName = fileStatus.getPath().getName();// 长度long len = fileStatus.getLen();// 权限FsPermission permission = fileStatus.getPermission();// 所属组String group = fileStatus.getGroup();// 所属用户String owner = fileStatus.getOwner();System.out.println(fileName + "\t" + len + "\t" + permission + "\t" + group + "\t" + owner);System.out.println("================================");// 块信息BlockLocation[] blockLocations = fileStatus.getBlockLocations();for (BlockLocation blockLocation : blockLocations) {String[] hosts = blockLocation.getHosts();for (String host : hosts) {System.out.println("主机名称:" + host);}}}}(5)文件夹判断
// 文件夹的判断@Testpublic void isFile() throws Exception {FileStatus[] fileStatuses = fileSystem.listStatus(new Path("/"));for (FileStatus fileStatus : fileStatuses) {boolean flag = fileStatus.isFile();if (flag) {System.out.println("文件:" + fileStatus.getPath().getName());} else {System.out.println("文件夹:" + fileStatus.getPath().getName());}}}(6)I/O流操作HDFS
以上我们使用的API操作都是HDFS系统框架封装好的。我们自己也可以采用IO流的方式实现文件的上传和下载。
// 使用IO流操作HDFS// 上传文件:准备输入流读取本地文件,使用hdfs的输出流写数据到hdfs@Testpublic void uploadFileIO() throws Exception {// 读取本地文件的输入流FileInputStream inputStream = new FileInputStream(new File("C:/Users/小不点/Desktop/test.txt"));// 准备写数据到hdfs的输出流FSDataOutputStream outputStream = fileSystem.create(new Path("/Java.txt"));// 输入流数据拷贝到输出流IOUtils.copyBytes(inputStream, outputStream, 4096, true); // 最后一个参数代表是否关闭流,true为关闭}// 下载文件@Testpublic void downloadFile() throws Exception {// 读取hdfs文件的输入流FSDataInputStream inputStream = fileSystem.open(new Path("/lagou.txt"));// 准备写数据到本地的输出流FileOutputStream outputStream = new FileOutputStream("C:/Users/小不点/Desktop/张三.txt");// 输入流数据拷贝到输出流IOUtils.copyBytes(inputStream, outputStream, 4096, true); // 最后一个参数代表是否关闭流,true为关闭}(7)seek 定位读取
// seek定位读取hdfs文件:使用IO流读取/lagopu.txt文件内容输出两次,本质就是读取文件内容两次并输出@Testpublic void seekReadFile() throws Exception {// 创建读取hdfs文件的输入流FSDataInputStream inputStream = fileSystem.open(new Path("/Java.txt"));// 控制台输出System.out// 实现流拷贝IOUtils.copyBytes(inputStream, System.out, 4096, false);// 再次读取文件inputStream.seek(0);// 定位从0偏移量(文件头部)再次读取IOUtils.copyBytes(inputStream, System.out, 4096, false); // false代表不关闭流// 关闭输入流IOUtils.closeStream(inputStream);}全部完整代码
package com.lagou.hdfs;import org.apache.hadoop.conf.Configuration;
import org.apache.hadoop.fs.*;
import org.apache.hadoop.fs.permission.FsPermission;
import org.apache.hadoop.io.IOUtils;
import org.junit.After;
import org.junit.Before;
import org.junit.Test;import java.io.File;
import java.io.FileInputStream;
import java.io.FileOutputStream;
import java.io.IOException;
import java.net.URI;
import java.net.URISyntaxException;public class HdfsClientDemo {FileSystem fileSystem = null;@Beforepublic void init() throws Exception {Configuration configuration = new Configuration();configuration.set("fs.defaultFS", "hdfs://hadoop1:9000");// configuration.set("dfs.replication","2");fileSystem = FileSystem.get(configuration);}@Testpublic void testMkdirs() throws Exception {// 1、获取Hadoop 集群的configuration对象Configuration configuration = new Configuration();configuration.set("fs.defaultFS", "hdfs://hadoop1:9000"); // 设置这个属性以后,获取FileSystem对象时,就不在需要创建URI连接对象了// 2、根据configuration获取FileSystem对象// FileSystem fileSystem = FileSystem.get(new URI("hdfs://hadoop1:9000"), configuration, "root");FileSystem fileSystem = FileSystem.get(configuration);// 3、使用FileSystem对象创建一个测试目录fileSystem.mkdirs(new Path("/api_test11"));// 4、释放FileSystem对象(类似数据库连接)fileSystem.close();}@Afterpublic void destroy() throws Exception {fileSystem.close();}// 上传文件@Testpublic void copyFromLocalToHdfs() throws Exception {/*** src:源文件目录,本地路径* dst:目标文件目录,hdfs路径*/fileSystem.copyFromLocalFile(new Path("C:/Users/小不点/Desktop/VPN.txt"), new Path("/VPN.txt"));// 上传文件到hdfs默认的是3个副本/**如何改变上传文件的副本数量* 1、configuration对象中指定新的副本数量* 2、创建xml文件,在里面添加属性*/}// 下载文件@Testpublic void copyFromHdfsToLocal() throws Exception {/*** boolean:是否删除源文件* src:源文件目录,hdfs路径* dst:目标文件目录,本地路径*/fileSystem.copyToLocalFile(true, new Path("/VPN.txt"), new Path("D:/下载/VPN.txt"));}// 删除文件或文件夹@Testpublic void deleteFile() throws IOException {// boolean值代表是否递归删除文件fileSystem.delete(new Path("/api_test11"), true);}// 遍历hdfs的根目录得到文件夹以及文件夹的信息:名称、权限、大小@Testpublic void listFiles() throws Exception {// 得到一个迭代器:装有指定目录下所有的文件信息RemoteIterator<LocatedFileStatus> remoteIterator = fileSystem.listFiles(new Path("/"), true);// 遍历迭代器while (remoteIterator.hasNext()) {LocatedFileStatus fileStatus = remoteIterator.next();// 文件名称String fileName = fileStatus.getPath().getName();// 长度long len = fileStatus.getLen();// 权限FsPermission permission = fileStatus.getPermission();// 所属组String group = fileStatus.getGroup();// 所属用户String owner = fileStatus.getOwner();System.out.println(fileName + "\t" + len + "\t" + permission + "\t" + group + "\t" + owner);System.out.println("================================");// 块信息BlockLocation[] blockLocations = fileStatus.getBlockLocations();for (BlockLocation blockLocation : blockLocations) {String[] hosts = blockLocation.getHosts();for (String host : hosts) {System.out.println("主机名称:" + host);}}}}// 文件夹的判断@Testpublic void isFile() throws Exception {FileStatus[] fileStatuses = fileSystem.listStatus(new Path("/"));for (FileStatus fileStatus : fileStatuses) {boolean flag = fileStatus.isFile();if (flag) {System.out.println("文件:" + fileStatus.getPath().getName());} else {System.out.println("文件夹:" + fileStatus.getPath().getName());}}}// 使用IO流操作HDFS// 上传文件:准备输入流读取本地文件,使用hdfs的输出流写数据到hdfs@Testpublic void uploadFileIO() throws Exception {// 读取本地文件的输入流FileInputStream inputStream = new FileInputStream(new File("C:/Users/小不点/Desktop/test.txt"));// 准备写数据到hdfs的输出流FSDataOutputStream outputStream = fileSystem.create(new Path("/Java.txt"));// 输入流数据拷贝到输出流IOUtils.copyBytes(inputStream, outputStream, 4096, true);}// 下载文件@Testpublic void downloadFile() throws Exception {// 读取hdfs文件的输入流FSDataInputStream inputStream = fileSystem.open(new Path("/lagou.txt"));// 准备写数据到本地的输出流FileOutputStream outputStream = new FileOutputStream("C:/Users/小不点/Desktop/张三.txt");// 输入流数据拷贝到输出流IOUtils.copyBytes(inputStream, outputStream, 4096, true);}// seek定位读取hdfs文件:使用IO流读取/lagopu.txt文件内容输出两次,本质就是读取文件内容两次并输出@Testpublic void seekReadFile() throws Exception {// 创建读取hdfs文件的输入流FSDataInputStream inputStream = fileSystem.open(new Path("/Java.txt"));// 控制台输出System.out// 实现流拷贝IOUtils.copyBytes(inputStream, System.out, 4096, false);// 再次读取文件inputStream.seek(0);// 定位从0偏移量(文件头部)再次读取IOUtils.copyBytes(inputStream, System.out, 4096, false);// 关闭输入流IOUtils.closeStream(inputStream);}
}


![贤鱼的刷题日常--P2671 [NOIP2015 普及组] 求和](https://img-blog.csdnimg.cn/45349679fc4748499d6fd459d6b885f9.gif)